JSON restores progress · CSV is for spreadsheets. JSON import: max 1,000,000 bytes.
Chapter 1Not started
Open reception
01
Before you start
Start at the broken-down car.
02What to doA nudge in the right direction
Use the roadside payphone and enter the museum. Collect code-note halves from the Allosaurus hand and Brontosaurus base; open reception with your completed clue.
03What should happenReveal the solution
The employee route opens.
Still stuck?
Check your active objective and your own clue. Published code examples disagree; that does not establish randomization.
Take the theater token from the box office and insert it into the theater token machine. Enter and let the presentation begin.
03What should happenReveal the solution
The opening presentation starts.
Still stuck?
Check the item’s inventory label and the door or machine you are using. This step needs the earlier pickup; reaching the location alone is insufficient.
Take the staff door beside the stage; climb the crates and cage to the projection room. Fit the table fuse, get three green indicators, and press the projector button. Return and finish the film.
03What should happenReveal the solution
The Time Tunnel exit opens.
Still stuck?
If the fusebox shows three green indicators but the Time Tunnel is closed, check the projector’s red button and whether the restarted film has finished. If a timing press fails, wait for the marker’s next pass rather than treating the fuse pickup as a completed repair.
Reach the Watering Hole control room and finish Stella’s call.
02What to doA nudge in the right direction
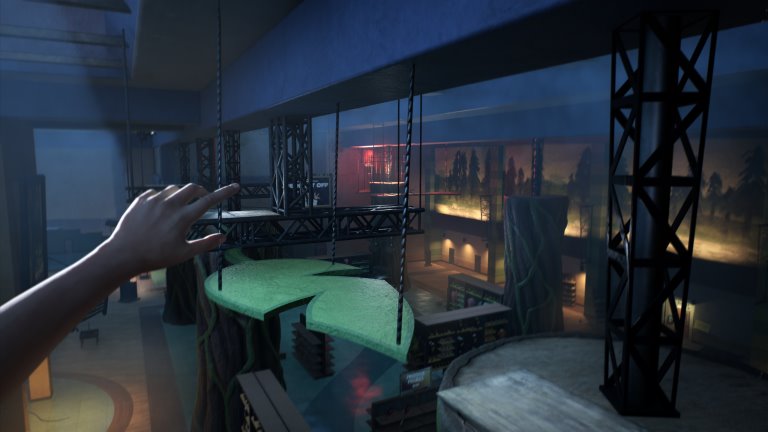
Activate all three upper switches: climb the dinosaur and ladder on the right; use the balcony, branches and bars; reach the raised display beside the control room. Return to the main lever and pull it.
03What should happenReveal the solution
The exhibit gate opens.
Still stuck?
A raised switch is only one part of the gate circuit. Check the dinosaur-and-ladder route, the balcony-and-branches route and the display beside the control room; after all three, return to the room’s main lever. If you have only reached the room, finish Stella’s call before following those routes.
Cross above the electrified floor using ledges, pipes and yellow holds. Take the token from the raised open box and exchange it at the purple Dilo Dash counter.
03What should happenReveal the solution
You have a light for the dark attraction.
Still stuck?
Identify the next marked ledge or bar before jumping. Movement prompts vary by input device; this guide has not tested every platform.
Ride the moving dinosaur display to the opposite platform. Take the button beside the open case on the crates; return by the lower route. Fit and press it, then pass the opening into the service route, laboratory and shops.
03What should happenReveal the solution
The gift-shop route is accessible.
Still stuck?
Plan the route before activating the control. If the timed opening or goo retracts, return to its button and trigger it again.
The basement door is accessible after Stella’s call.
02What to doA nudge in the right direction
Collect all three basement fuses. Repair the pillar fuseboxes by the office, toy shop and arcade, completing each timing sequence. Move away from the pursuing mascot before returning to a panel.
03What should happenReveal the solution
Three repaired fuseboxes await their upper connections.
Still stuck?
Match each basement fuse to the office-side, toy-side and arcade-side pillar boxes, then check which timing repair is still unfinished. If all three boxes are repaired but the lights remain off, the next check is the three upper connections, not another basement fuse search.
Use the arcade’s upper vent to reach the rafters. Cross the beams and bars and plug in all three connections above the pillars. Return through the vent to the office and finish Stella’s call.
03What should happenReveal the solution
The floor-level floodlight controls are ready.
Still stuck?
Lower fusebox repairs and upper plugs are separate checks: trace all three pillar tops from the arcade vent route. If the three plugs are connected, return through that vent to the office and finish Stella’s call before testing the floor-level floodlight controls.
Collect both torn clue halves: one from the Allosaurus hand and one at the Brontosaurus base. Read the completed clue before using the reception keypad. Published code examples disagree, so use your own in-game clue; that disagreement alone does not prove the code is randomized.
The projector has power. Why is the Time Tunnel exit still closed?
If you have not entered the theater, first use the box-office token at its machine. After the presentation stops, fit the projection-room fuse and get three green indicators. Press the projector button, return to the theater and let the film finish before checking the exit.
Which switches open the Watering Hole exhibit gate?
Finish Stella’s call in the control room, then activate all three upper switches. Their routes use the right-hand dinosaur and ladder, the balcony with branches and bars, and the raised display beside the control room. Return to the main lever and pull it after all three.
Where do I get the flashlight before the dark attraction?
After opening the exhibit gate, cross above the electrified floor using ledges, pipes and yellow holds. Take the token from the raised open box, then exchange it at the purple Dilo Dash counter. Reaching the counter without that token does not finish the pickup.
The meteor console is missing a button. Where should I go?
Ride the moving dinosaur display to the opposite platform. The button is beside the open case on the crates. Return by the lower route, fit and press the button, then use the newly opened route toward the service area, laboratory and shops.
Why do the gift-shop floodlights still not work after I fit three fuses?
After the office video and Stella’s call, collect the three basement fuses and repair each pillar fusebox. Then use the arcade vent to connect all three plugs above the pillars. Return for the call, then hold each floor-level pillar interaction until complete; a brief tap is insufficient.
Bronto blocks the glass exit. How do I leave the museum?
Once the floodlights make the shop exit available, approach the glass doors to trigger the obstruction. Turn back to the basement opened earlier, descend the stairs and follow the cave toward the first digsite. The glass doors are not the final escape route in this sequence.