Free guide tools, with no account required. Terrible Lizards chapter 4 walkthrough: Follow 11 sourced steps for DJ’s tooth, the crew camp, Cavern B and the final lift chase, with remaining gaps stated.
Free guide tools · $0No accountJSON backupsSaved in this browser
The companion tools are free; the game is a separate purchase.
JSON restores progress · CSV is for spreadsheets. JSON import: max 1,000,000 bytes.
Chapter 4Not started
Release the counterweight
01
Before you start
Escape the opening blue-cave chase to the abandoned camp.
02What to doA nudge in the right direction
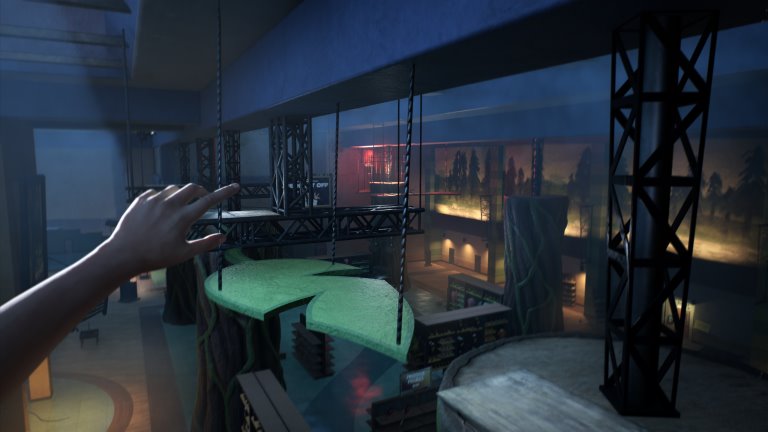
Follow the glowing surfaces and timber route to the counterweight. Press its red button to release the weight; bounce up the exposed goo route to the scaffolding and upper passage.
03What should happenReveal the solution
The upper route toward DJ is open.
Still stuck?
Check each required connection and finish the current call or interaction. If the expected event still fails, compare your installed build with the official patch notes.
You have passed the counterweight and an unusable gun.
02What to doA nudge in the right direction
Follow the crying voice to DJ and hear his request. Cross the pit on hanging bars, take the side passage and collect the Allo tooth in the small room. Continue up the stairs to the projection room.
03What should happenReveal the solution
You have DJ’s tooth before the next encounter.
Still stuck?
Hearing DJ’s request does not confirm that you picked up the tooth. If it is missing, check the small room reached by the hanging bars across the pit and its side passage; if you already have it, the stairs lead onward to the projection-room encounter, not another tooth pickup.
The presentation has ended with a creature breaking the screen.
02What to doA nudge in the right direction
Try the weapon on the nearby crates, then the next beside the green-lit stack. Both fail. When Jordan abandons the gun, leave through the open cave and continue until the return-to-DJ objective appears.
03What should happenReveal the solution
The scripted encounter ends; DJ is your next objective.
Still stuck?
The failed guns belong to this scripted sequence. Follow the next pickup and exit objective rather than waiting for a weapon to become usable.
You have the tooth and the objective has sent you back to DJ.
02What to doA nudge in the right direction
Return to DJ with the tooth. After the dialogue, follow the new attack route through blue tunnels, yellow bars, goo walls and timber ledges to the crew-lift camp.
03What should happenReveal the solution
DJ waits at the covered lift controls.
Still stuck?
First compare the active objective: the return-to-DJ prompt follows the failed-gun encounter and the open-cave escape. Once that prompt appears and the tooth is collected, return for the dialogue; the next attack leads toward the crew-lift camp, so do not wait at the gun pickups for them to become usable.
Speak to DJ, then take the sloping path outside to the switch on a wooden post. Turn on the camp lights and return to DJ and the projection area for the lift-key objective.
03What should happenReveal the solution
You are directed to recover the crew-lift key.
Still stuck?
If DJ is at the covered desk but the lift-key objective has not appeared, check the conversation and the camp-light switch on the wooden post along the outside slope. After the lights are on, return to DJ and the projection area; merely reaching the locked lift is not that objective’s completion.
The key is in Cavern B, whose entrance is blocked.
02What to doA nudge in the right direction
Enter Cavern A. Follow its ramps, goo walls, bars and platforms to the dynamite worktable. Bring the charge back to B, plant it at the obstruction and use its plunger.
03What should happenReveal the solution
Cavern B is open.
Still stuck?
Picking up dynamite is not a detonation. Finish planting at the marked receptacle, then use the separate plunger.
Use bounce goo, wallrunning panels and hanging bars to reach the high ridge. Take the key beside the body and final note before dropping toward the exit.
03What should happenReveal the solution
You have the key required at the crew-lift controls.
Still stuck?
Identify the next marked ledge or bar before jumping. Movement prompts vary by input device; this guide has not tested every platform.
Follow the marked chase route and wallruns until the cliff encounter ends. Continue past the tents to the next explosive obstruction; plant at its marked receptacle and detonate to reopen the camp route.
03What should happenReveal the solution
The return path to the crew-lift camp is open.
Still stuck?
The published route describes this return blast but does not locate a separate charge pickup. Check your active objective and inventory; no extra locker location is verified here.
You have returned to the crew-lift camp with its key.
02What to doA nudge in the right direction
Insert and turn the key at the covered desk, then operate the lever. Go downstairs beneath the Crew Lift sign, board with DJ and press the inside start button.
03What should happenReveal the solution
The lift starts its ascent.
Still stuck?
If the lift is idle, separate the desk controls from the onboard start: check that the recovered key was inserted and turned and the lever operated. Then go below the Crew Lift sign and board with DJ to use the inside button; stopping at the desk omits the final start action.
The creature has forced Jordan off the rising lift.
02What to doA nudge in the right direction
Follow side-wall goo, yellow bars and ledges upward. Cross the higher panels and red suspended structure, pass the cramped cave and smaller creatures, then run toward DJ’s call and jump back onto the lift.
03What should happenReveal the solution
The final lift struggle plays out.
Still stuck?
Identify the next marked ledge or bar before jumping. Movement prompts vary by input device; this guide has not tested every platform.
How do I reach the upper passage at the counterweight?
Follow the glowing surfaces and timber route to the counterweight and press its red button. Releasing the weight exposes the goo-assisted climb. Bounce up to the scaffolding and continue through the upper passage toward DJ; the release comes before that climb.
Where is DJ’s tooth, and when should I return it?
Hear DJ’s request, cross the pit on the hanging bars and take the side passage to the small room containing the Allo tooth. Continue upstairs to the projection room and complete the following encounter. When the return-to-DJ objective appears, go back with the tooth and finish the dialogue.
The guns keep failing. Am I missing a weapon repair?
The nearby-crate weapon and the next weapon beside the green-lit stack both fail in this scripted sequence. Try the next pickup as directed. Once Jordan abandons the gun, leave through the open cave and continue until the return-to-DJ objective appears; no repair step is established for these weapons.
How do I turn on the crew-camp lights?
Speak to DJ at the covered lift controls. Take the sloping path outside to the switch on a wooden post and turn it on. Return to DJ and the projection area for the crew-lift-key objective. Staying at the covered desk does not operate the outside light switch.
How do Cavern A and Cavern B lead to the crew-lift key?
In Cavern A, follow ramps, goo walls, bars and platforms to the dynamite worktable. Bring the charge back to B, plant it at the obstruction and use the plunger. Inside the opened route, climb the bounce-goo and wallrun path to the high ridge; take the key beside the body and final note.
Where is the separate dynamite pickup for reopening the return to camp?
The researched return route describes planting at the later obstruction and using its plunger, but it does not establish a separate charge pickup. Check your current objective and inventory. This supply point remains unverified; the earlier Cavern A charge does not prove an additional locker or automatic replenishment.
How do I start the crew lift and catch it during the final chase?
Turn the key at the covered desk and operate the lever. Board below the Crew Lift sign with DJ and press the inside button. During the separation, follow side-wall goo, yellow bars, ledges and the red suspended structure toward DJ’s call, then jump back aboard. After the ascent, follow DJ through the dark passage to the surface ladder.