Free guide tools, with no account required. Terrible Lizards chapter 3 walkthrough: Follow 16 sourced steps through bounce goo, train power, wallrunning, the Shed key and the four-fuse exit.
Free guide tools · $0No accountJSON backupsSaved in this browser
The companion tools are free; the game is a separate purchase.
JSON restores progress · CSV is for spreadsheets. JSON import: max 1,000,000 bytes.
Chapter 3Not started
Use the bounce-goo route
01
Before you start
You have washed into the next digsite and spoken to Stella.
02What to doA nudge in the right direction
Climb past the tower and machinery. Run and jump from yellow bounce goo toward the upper landing. Later, press the red button to expose the timed goo and bounce before it retracts.
03What should happenReveal the solution
You reach the larger train worksite.
Still stuck?
Plan the route before activating the control. If the timed opening or goo retracts, return to its button and trigger it again.
The train console and raised control room lack power.
02What to doA nudge in the right direction
Pull the exterior lever beside the control-room door. Return inside and press the red button to break open the locker below; take its dynamite.
03What should happenReveal the solution
You can blast the blocked metal doorway.
Still stuck?
If the control-room red button is unpowered, recheck the exterior lever beside that room’s door. If the locker below has opened but the metal doorway is still blocked, collect the charge and move to the separate planting-and-detonation step; pressing the locker button again is not that blast.
Plant it at the blocked metal doorway and use the plunger. Start the generator beyond the blast, return to the train controls and activate the powered machinery. Follow the raised route and tunnels.
03What should happenReveal the solution
The route reaches the first Allosaurus hunting area.
Still stuck?
Picking up dynamite is not a detonation. Finish planting at the marked receptacle, then use the separate plunger.
Face the Allo to pause it briefly, then move toward the next rock slit or turn. Use the escape markings and gaps too narrow for its body; move on before the stare makes it angry.
03What should happenReveal the solution
You can reach the water escape.
Still stuck?
Keep the next marked escape route or narrow passage in view before leaving cover. Follow this encounter’s objective; do not transfer the Allo stare rule to other creatures.
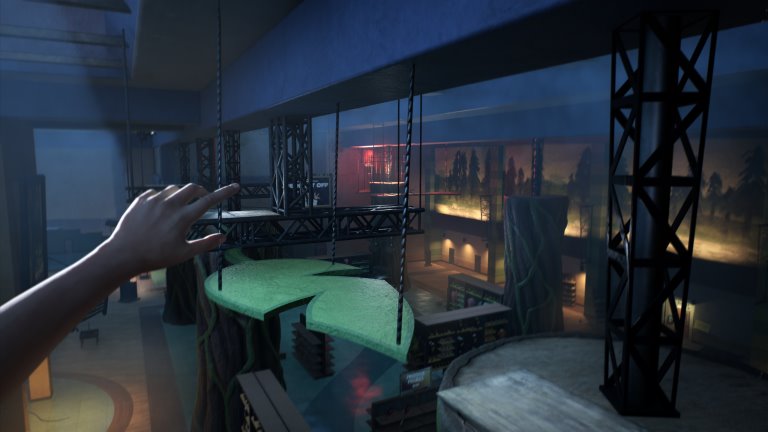
Run and jump onto a goo-covered panel. Jump off toward the next ledge or hanging bar, then link the panels along the marked route to the freight buildings.
03What should happenReveal the solution
The freight-office and track area is accessible.
Still stuck?
Identify the next marked ledge or bar before jumping. Movement prompts vary by input device; this guide has not tested every platform.
Search the freight offices for the key and use it at the locked work gate. Continue into the power route beyond it.
03What should happenReveal the solution
The freight generator route is open.
Still stuck?
Check the item’s inventory label and the door or machine you are using. This step needs the earlier pickup; reaching the location alone is insufficient.
The main freight control has no power and the work gate is open.
02What to doA nudge in the right direction
Use the side goo wall and ladder route to the power area. Repair the fusebox just inside the gate, then follow the stairs and cable to start the yellow generator.
03What should happenReveal the solution
The hanging-platform controls have power.
Still stuck?
Check each required connection and finish the current call or interaction. If the expected event still fails, compare your installed build with the official patch notes.
Press the upper red button and cross via the goo wall, hanging bar, panels and red frame. At the lower scaffold press the next red button to bring the second platform, then cross toward the timber shaft.
03What should happenReveal the solution
The tall shaft traversal is reachable.
Still stuck?
Plan the route before activating the control. If the timed opening or goo retracts, return to its button and trigger it again.
Climb the timber shaft using ladders, yellow ledges and supports. When Allo interrupts the lift, follow the cave escape; pass Dalton’s belongings and continue to the large rail cavern.
03What should happenReveal the solution
You reach the four-fuse hunting area.
Still stuck?
Keep the next marked escape route or narrow passage in view before leaving cover. Follow this encounter’s objective; do not transfer the Allo stare rule to other creatures.
The rail cavern needs four fuses and generator power.
02What to doA nudge in the right direction
Follow the colored cables to the fenced yellow generator. Take the fuse from the lit green workbench and start the generator.
03What should happenReveal the solution
One fuse is collected and the cavern has generator power.
Still stuck?
The lit green workbench pickup and the yellow generator start are two different actions. If you collected this fuse but the cavern still lacks power, recheck the generator itself; if power is restored but you are short of fuses, compare the low office, upper office and locked shed instead of assuming this pickup supplied all four.
Enter the low office with broad windows facing the cavern and collect its fuse. Use the narrow rock gap outside to get clear of the pursuing Allo.
03What should happenReveal the solution
The low-office fuse is collected.
Still stuck?
Use the building’s position to distinguish this pickup: it is the low office with wide windows facing the cavern, not the wooden office on the upper loop. If Allo prevents a clear check, use the narrow rock gap outside to get clear before revisiting the office; finding a different fuse does not confirm this one.
The locked ground-level shed needs its key from above.
02What to doA nudge in the right direction
Climb near the Call It In sign; cross bars and goo panels to the key cabinet and take Shed. Continue over the upper platforms to the small wooden office with desk and video equipment; take its fuse.
03What should happenReveal the solution
You have the Shed key and upper-office fuse.
Still stuck?
Check the two pickups separately: the elevated cabinet supplies the key marked Shed, while the small wooden office farther along the upper route supplies a fuse. If you have Shed but are still missing a fuse, recheck the office with desk and video equipment rather than counting the key as that fuse.
Return to ground level and follow the tracks to the wooden shed with the keys-above notice. Unlock it and take the fuse from the lit workbench.
03What should happenReveal the solution
The shed’s fuse is collected.
Still stuck?
If the ground-level shed is still locked, check for the actual Shed key from the upper cabinet, not just completion of the upper climb. If the door is open but this fuse is unconfirmed, check the lit workbench inside the trackside shed with the keys-above notice; the upper-office fuse is a different pickup.
The generator is running and you have all four replacement fuses.
02What to doA nudge in the right direction
Fit all four into the single central panel beside the bright floodlights. Check that all indicators are green, then use the large control console to open the route.
03What should happenReveal the solution
The Motherlode route opens.
Still stuck?
Check all four green indicators and generator power first. Official patch 1.0.9 lists a second-Allo-hunt fuse fix; it does not prove an existing save is repaired.
Follow the Motherlode climb and outpost route. Climb the tower exterior to its control room and use the red console to open the descent into the blue caves.
03What should happenReveal the solution
Chapter Four begins in the organic caves.
Still stuck?
Check each required connection and finish the current call or interaction. If the expected event still fails, compare your installed build with the official patch notes.
Why does the yellow bounce goo disappear before I reach it?
One later goo section is timed: the red button exposes it only temporarily. Identify the landing before pressing the button, then run and jump from the goo toward the upper route. If it retracts, return to the button and trigger it again rather than jumping at the inactive surface.
What is the order for powering and moving the train?
Pull the exterior lever beside the control-room door, then press the red button inside to break open the dynamite locker below. Blast the blocked metal doorway with its charge and plunger. Start the generator beyond it, return to the train controls and activate the powered machinery.
Can I stop the Allo by staring at it throughout the hunt?
Facing the Allo pauses it only briefly; prolonged staring makes it angry. Use that pause to move toward the next rock slit or turn, following escape markings and gaps too narrow for its body. Plan the next gap before leaving safety, and do not treat staring as a permanent freeze.
Why will the hanging freight platforms not move into place?
Use the freight-office key at the work gate, repair the fusebox just inside, and start the yellow generator up the stairs and cable route. Then operate both controls: the upper red button moves the first platform, and the lower scaffold’s red button brings the second. Power alone does not position both.
Where are the four cavern fuses and the Shed key?
The fuses are at the generator’s lit green bench, the low office, the upper wooden office and the locked shed. Climb near the Call It In sign, cross bars and goo panels, and take Shed from the upper key cabinet. Return to ground level and follow the tracks to unlock the shed.
I fitted four fuses. Why is the Motherlode route still closed?
Fit all four in the single central panel beside the bright floodlights, check four green indicators and generator power, then operate the large control console. Patch 1.0.9 mentions a second-Allo-hunt fuse fix; that note does not establish that an existing save has been repaired.
How do I leave the Motherlode area for the blue caves?
After opening the four-fuse route, continue along the Motherlode climb and outpost path. Climb the tower’s exterior to its control room and use the red console. That control opens the descent into the blue caves, where Chapter Four begins; reaching the tower base alone is not the final step.